


ALEX Testnet Complete Tutorial for Bitcoin DeFi Service Platform

 ALEX Testnet Tutorial Comprehensive Illustrated Guide.
The Bitcoin DeFi service platform alexGo has launched its testnet, and Chain Catcher has compiled the alexGo testnet tutorial without altering the original meaning:
Testnet Phase One - User Instructions
Step One: Faucet
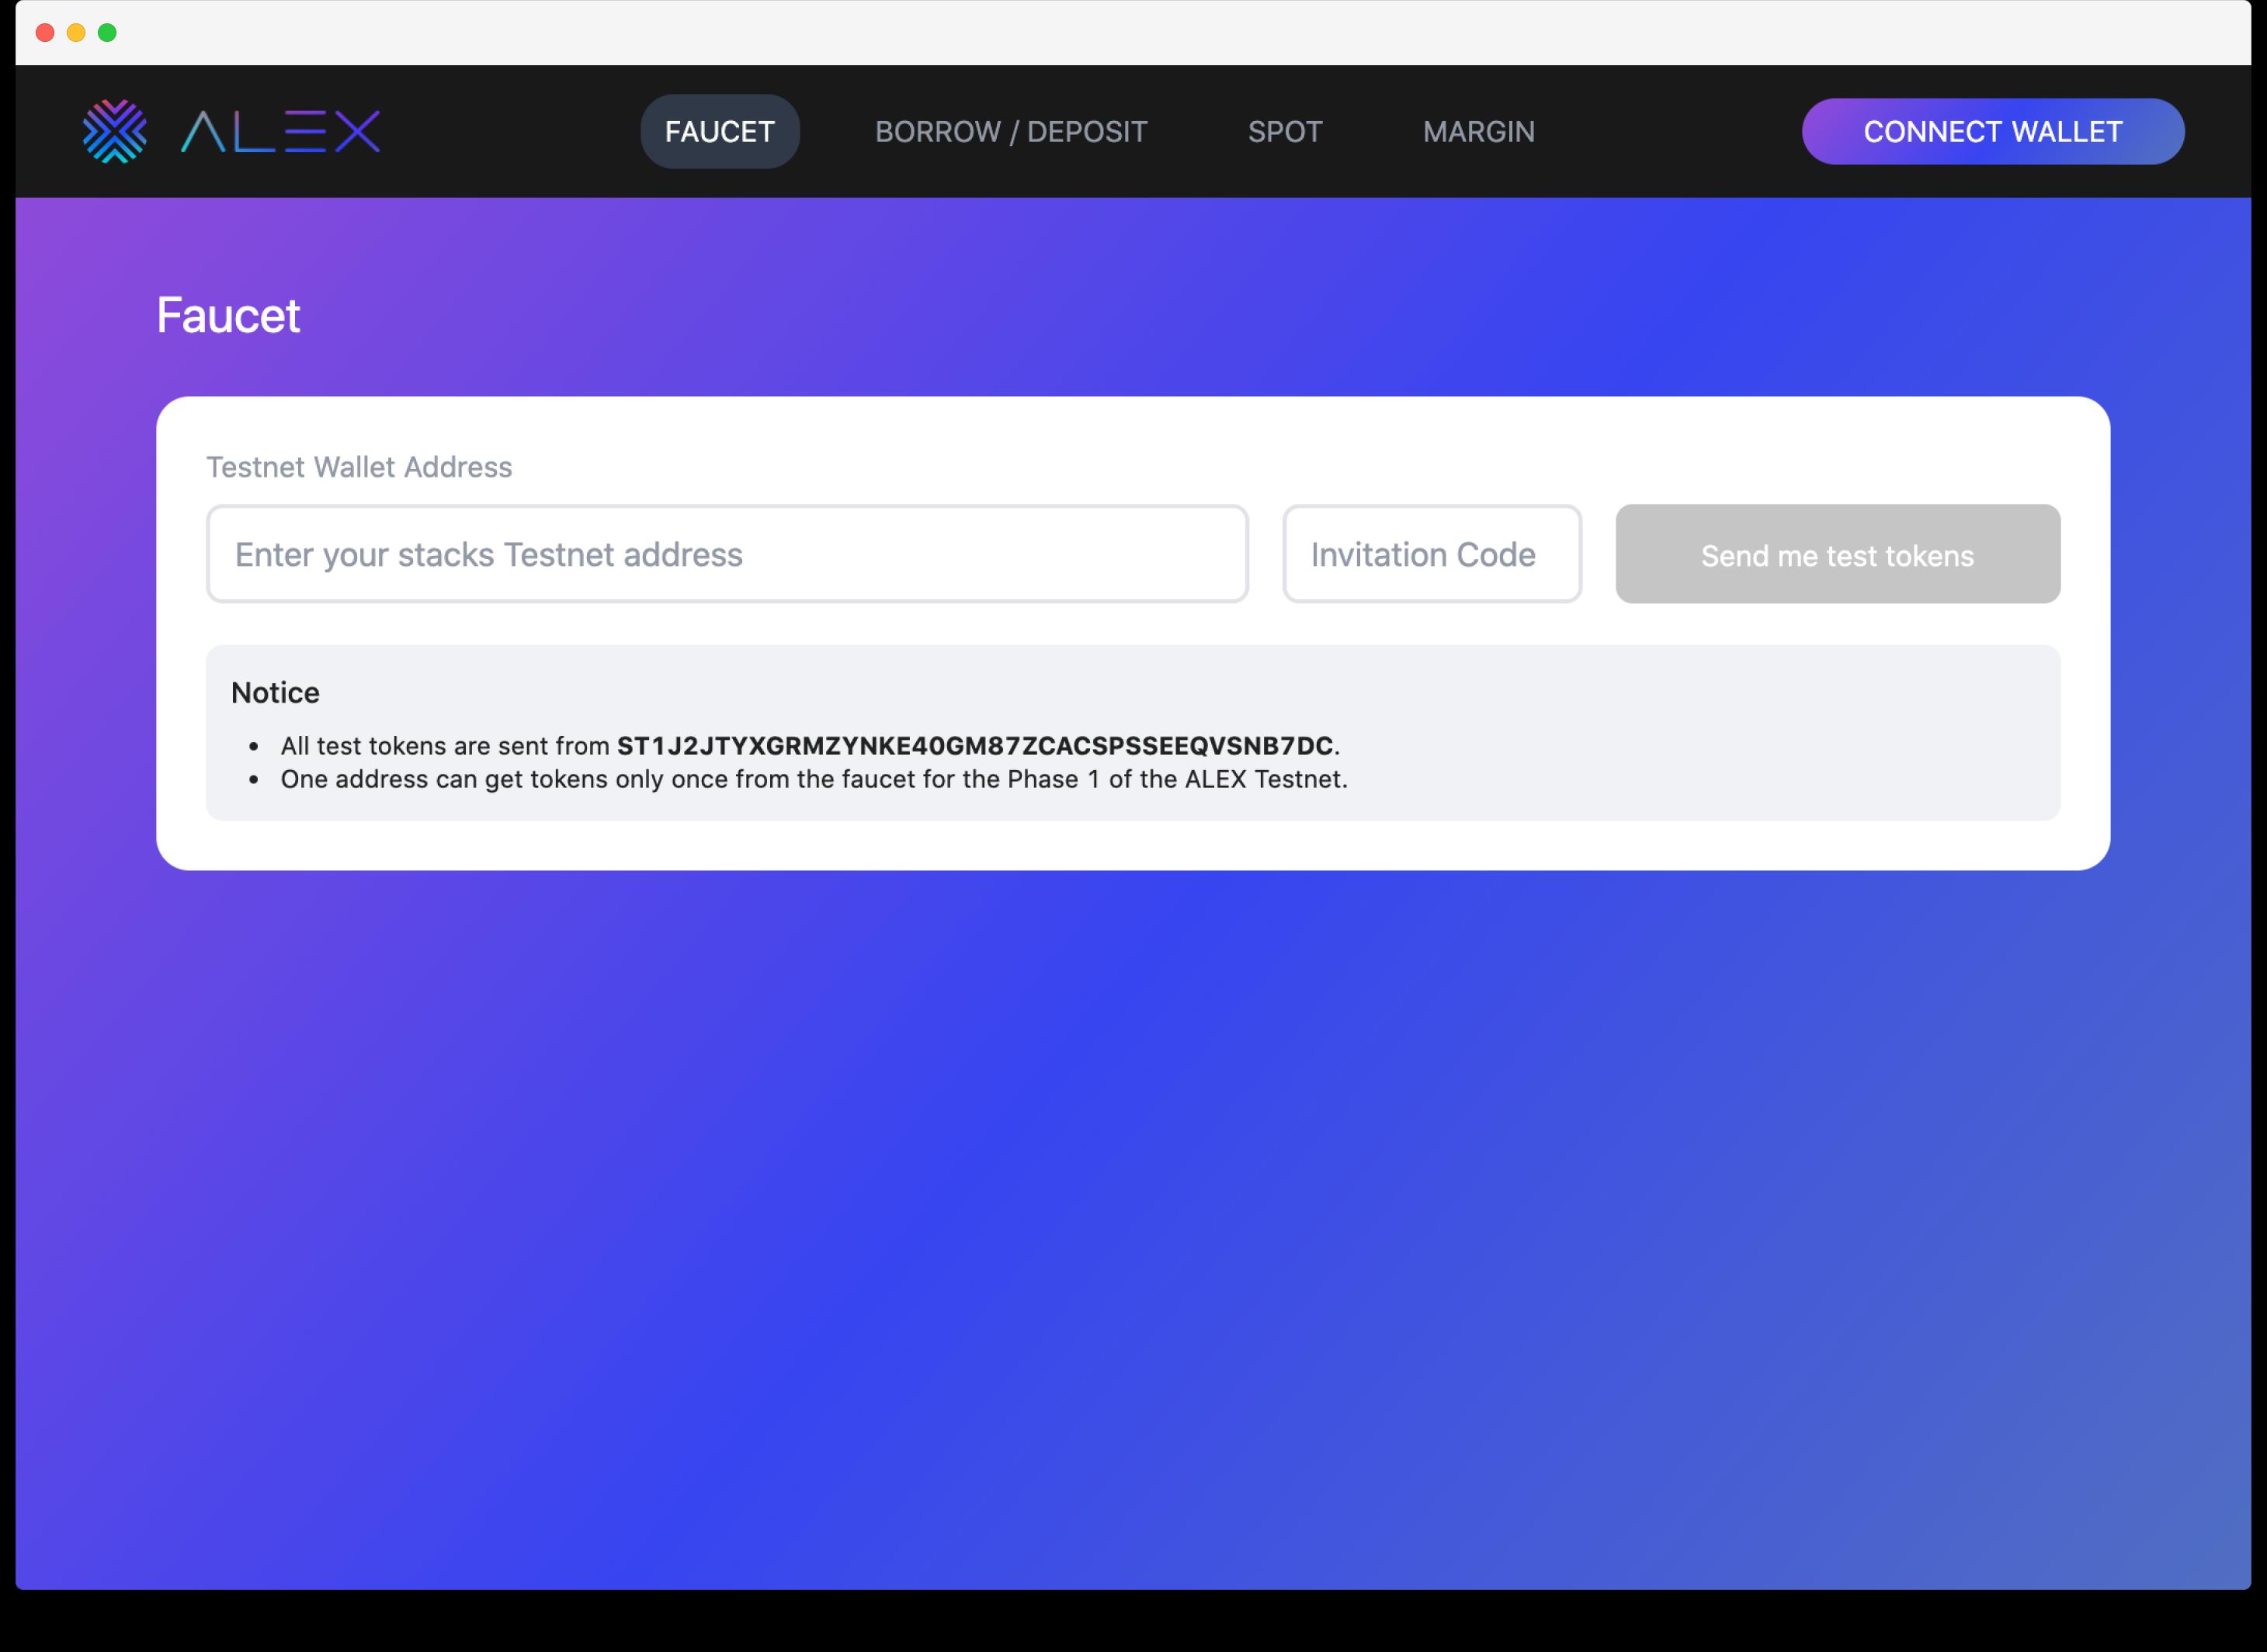
To access the faucet, you need to do two things:
ALEX testnet wallet address
A valid invitation code
To set up your ALEX testnet wallet address, you need to:
Only use the Chrome extension to set up your Hiro wallet. Please refer to our tutorial https://medium.com/alexgobtc/how-do-i-use-hiro-wallet-and-access-alex-testnet-13d1046b01b. You must use the Chrome extension to participate. Please do not use the desktop wallet.
You will also need a valid invitation code to access the faucet and receive test tokens. If your invitation code is invalid or expired, please contact us: contact@alexgo.io.
Step Two: Connect Wallet - Check Your Balance
You will see a borrow/lend page as shown below. You can see your wallet address and balance in the top menu.

Step Three: Deposit Function
Click the deposit button on the borrow/lend page.
You will enter the deposit WBTC page. Choose your a) deposit amount (or click the MAX button to deposit all WBTC from your wallet) and b) the maturity date with the corresponding APY.
After selecting your deposit amount and maturity date and APY, the estimated maturity interest and estimated transaction cost will be displayed.
Click the continue button, and a confirmation window will pop up with transaction details.

- Click the confirm button. The system will indicate whether the transaction is still processing, successful, or failed.

- After confirming the transaction, regardless of whether it is successful or not, the operation page will return to the borrow/lend page, displaying the transaction details.

The transaction details screen will display yield-Token, which includes information such as balance and maturity date. (APY, average purchase price, and profit and loss will be available soon…)
After maturity, click the withdraw button to exchange yield-Token back to Token.
The deposit process is complete.
Step Four: Borrow Function
Click the borrow button on the borrow/lend page.
You will enter the borrow WBTC page. Choose your:
a) Collateral asset (currently only USDA, more to come…)
b) Borrow amount (or click the MAX button to borrow the maximum amount of WBTC, considering your current USDA balance in the wallet)
c) Maturity date with the indicated APY.
After selecting a), b), and c), the estimated LTV, required collateral, maturity date interest, and estimated transaction cost will be displayed.
Click the borrow button, and a confirmation window will pop up with transaction details.

- Click the confirm button. The system will provide information on whether the transaction is still processing, successful, or failed.

- After confirming the transaction, regardless of whether it is successful or not, the operation page will return to the borrow/lend page, displaying the transaction details.

The transaction details screen will display key token information, such as: borrow amount, collateral position, locked excess value, and maturity date.
After maturity, click the Release button to release key-Token and recover the remaining value of the collateral (automatically deducted from the loan amount).
The borrowing process is complete.
Step Five: Spot Trading
On the Spot page, simply select the exchange from one token to another (currently only WBTC/USDA pair, more to come…).
After selecting two tokens for swapping, the current exchange rate and estimated transaction cost will be displayed.
Click the swap button, and a confirmation window will pop up with transaction details.

- Click the confirm button. The system provides information on whether the transaction is still processing, successful, or failed.

After confirming the transaction, regardless of whether it is successful or not, the operation page will return to the Spot homepage.
You can check your wallet balance.
The spot swap process is complete.
Step Six: Margin Trading
- On the margin page, select:
a) Trading pair (currently only WBTC/USDA, more to come…)
b) Your position (long or short)
c) Trading amount (or click the MAX button to get the maximum trading nominal under the current LTV ratio)
d) Maturity date
- Click the open BTC long/short position button, and a confirmation window will pop up with transaction details.

- Click the confirm button. The system will indicate whether the transaction is still processing, successful, or failed.

After confirming the transaction, regardless of whether it is successful, the operation page will return to the margin homepage, displaying the transaction details.
The transaction details interface will display WBTC/USDA, long or short, collateral position, position value, leverage, and maturity date information.

- After maturity, click the Claim button to release key-Token and recover the remaining P&L.
The margin trading process is complete.
 Risk warning Risk warning